Introduction
If you want to take that extra step to sound better and make playing the guitar more fun then you could turn to the capo. Many guitarists incorporate the use of the capo and it is indeed a great skill to master how to use a guitar capo for the best music-making experience.
If you are passionate about playing the guitar and changing the sound to complement your voice or choice of songs you wish to play using a capo then with the help of our beginner’s guide you will be able to do just that.
So without further ado let us get into it.
First, we will answer 3 important questions:
1. What is a capo?
2. How does it work?
3. What is its purpose?
What is a Capo?
A capo is a tool that you can use while playing the guitar to modify the sound or raise the tuning of the instrument to the desired level.
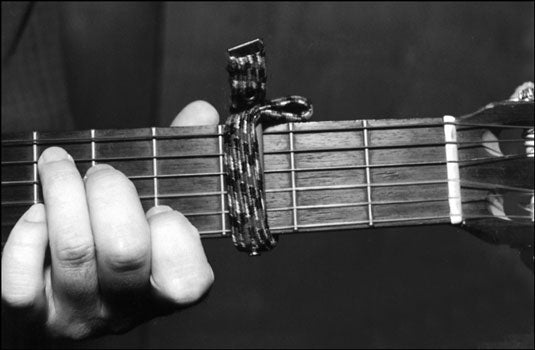
How does it work?
A capo looks and works like a clamp. It needs to be positioned at a point on the fretboard and ‘clamped’ down. You will need to loosen the capo to move it up and down the fretboard until you reach your targeted fret and then close the capo to lock it in place. Once this is done, all the strings on that particular fret will be pressed down.
What is its purpose?
The main purpose of a capo is to raise the key of the guitar. If you are having difficulty with complex chords down the neck then a capo will enable you to attempt them with more ease.
While playing the guitar with a capo you will be able to use the same open chord forms but the notes will be different.
For example, let us say that you have placed the capo on the first fret and played a C chord, the sound that will be produced will be a C#.
However, if you place the capo on the second fret then the sound will be of a D chord.
This is because moving the capo up just one fret will raise the chord half a step while moving the capo up two frets will move up the tone a full step.
In simple words, you must play thinking that the fret below the capo is the first fret on the guitar’s neck.
How to Use a Capo on Guitar: Main Steps
The two main steps involved are a) positioning the tool and b) playing with it.
We have explained both the steps below in the simplest way possible so even beginners can get a clear understanding of how to use a capo on the guitar.
a) Positioning the Capo
Step 1– You may need to turn to your sheet music that tells you which fret to place your capo on or as a beginner just use it on the first, second or third fret to get used to the change in tone.
Slide your open capo to the desired fret and clamp it down. This should press and hold all the strings down on the fret.
Step 2– Depending on the type of capo you need to make sure that the tension is distributed evenly so that the sound produced will be smooth. In order to do so, you must avoid tightening the capo while it is in the middle of a fret. Move it closer to the edge of the fret and closer to the body of the guitar before tightening it.
b) Playing with the Capo
Step 1– Tuning your guitar is crucial because it determines how the notes will sound when you play. There are several tuning techniques but the most common one for beginners is to go by the E,A,D,G,B,E rule. Always start from the top moving on to the bottom.
Step 2– First play the chords openly without using the capo. If you know how the chords sound naturally by ear, it’ll be easier and faster for you to pick up the newly made sounds by the addition of a capo.
Step 3– Know that bringing a capo further down will enhance the tone of the chords you’ll be playing. This will allow you to make more upbeat and buoyant music. Before choosing a specific fret to cover the rest of the song you wish to play, try experimenting by positioning the capo on each fret so you can learn what kind of sounds will be created through each fret.
Step 4– There’s plenty of transposition charts all over the internet and this can turn out to be of big help when you’re new to learning how to use a capo for guitar. Transposition charts help by letting you know which chord you are actually playing at the moment by showing you a visual representation of where your capo is placed.
Step 5– Before you start making music with a capo on, you need to clearly understand and identify the difference a capo makes when added to a guitar. You will be able to use open chords but once you put on the capo on a specific fret, the chord notes will be altered.
Even if your fingering positioning on the fret is the same as always, the notes emitted will not be the same as it used to be before a capo was introduced to the fretboard.
Step 6– Most of us take up guitar lessons as a hobby but there are some people among us who are aspiring artists or in a school band, hence increasing the necessity to learn how to play properly with a capo on while playing with others.
While it doesn’t seem like a problem, as a capo alters the note of a chord entirely, it can be confusing for every person in the group to make sure they’re all playing the same note. That is why it is necessary for everyone playing the guitar with a capo on to be on the same page.
As you know, there are seven chords for each of the keys and they correspond accordingly. The capo you will have on will change the chords when placed on the fret, so move it up and down in order to find the correct fret you are happy playing in.